A reliable garage door opener brings significant convenience by automating the opening and closing process. Whether upgrading or installing anew, setting up a garage door opener requires careful planning and execution. This guide walks you through each step for a seamless installation and optimal functionality.
Begin by assessing your garage door and selecting the right opener type. Prepare the area, ensuring adequate space and structural support. Follow manufacturer instructions to assemble and securely attach the opener to the ceiling. Installed and programmed remote controls, thoroughly testing the opener’s performance. Adjust settings like speed and sensitivity for safety and personal preference.
Consider professional garage door repair service assistance for complex tasks or troubleshooting. They can handle wiring intricacies, ensure proper alignment, and resolve issues. With proper setup and maintenance, your garage door opener will provide reliable service, enhancing convenience and security for your home or business.
Types of Garage Door Openers
Before diving into the installation process, it’s essential to understand the various types of garage door openers available on the market. The most common options include:
Chain-Driven Openers
Chain-driven openers use a metal chain to move the garage door. They are durable and affordable, making them popular for many homeowners. However, they can be noisy, which may be a concern if your garage is attached to living spaces.
Belt-Driven Openers
Belt-driven openers use a reinforced belt for operation, resulting in quieter and smoother performance. They are ideal for homes with living spaces near the garage. Though more expensive than chain-driven models, they offer significant noise reduction.
Screw-Driven Openers
Screw-driven openers move the garage door using a threaded steel rod. They are recognized for their reliability and low maintenance requirements. They have fewer moving parts, reducing the likelihood of issues over time. Screw-driven openers are a solid choice for those seeking dependable performance.
Direct-Drive Openers
Direct-drive openers move the garage door directly, without chains or belts, leading to quieter and more efficient operation. They experience less wear and tear with fewer moving parts, making them a long-lasting, low-maintenance option.
Garage Door Opener Setup Tools And Materials
Before you begin, make sure you have these tools and materials:
- Garage door opener kit (including the opener, rail, and hardware)
- Stepladder
- Drill and drill bits
- Wrenches and sockets
- Screwdrivers (flat and Phillips head)
- Wire strippers
- Hammer
- Measuring tape
- Safety glasses
- Extension cord (if needed)
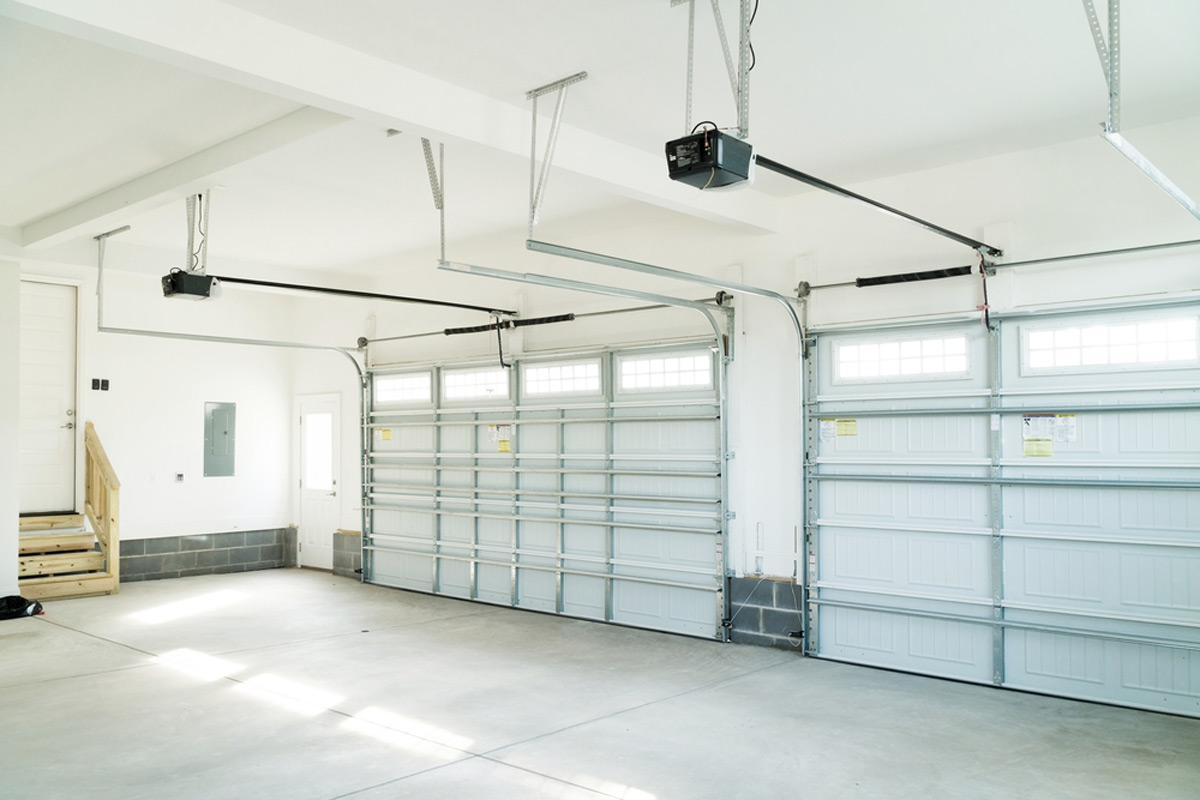
Prepare Your Garage for Installation
Proper preparation is crucial for a successful garage door opener installation. Follow these steps to ensure a smooth process:
Clear the Area
Remove any clutter, boxes, or objects from the garage floor and around the garage door. This will provide a clear workspace and prevent potential obstructions during the installation.
Disconnect the Existing Opener (if applicable)
If you are replacing an old garage door opener, disconnect it from the power source and detach it from the garage door. This ensures safety and clears the way for the new installation.
Check the Ceiling
Ensure that the garage ceiling is sturdy enough to support the weight of the new opener. Most openers require a solid mounting surface, such as a wooden beam or a reinforced concrete ceiling.
Measure and Mark
Carefully measure the dimensions of your garage door and the area where the opener will be installed. Mark the appropriate locations for mounting the opener and the rail system to ensure accurate placement and alignment.
Step 1: Unbox and Inspect the Garage Door Opener
Once you have everything ready, it’s time to unbox your new garage door opener. Follow these steps:
- Carefully remove all components from the packaging and lay them out on a clean, flat surface.
- Inspect each component for any visible signs of damage or defects.
- Cross-reference the components with the included instruction manual to ensure all necessary parts are present.
- Read through the entire instruction manual before proceeding with the installation. This will help you better understand the process and identify potential issues or special requirements.
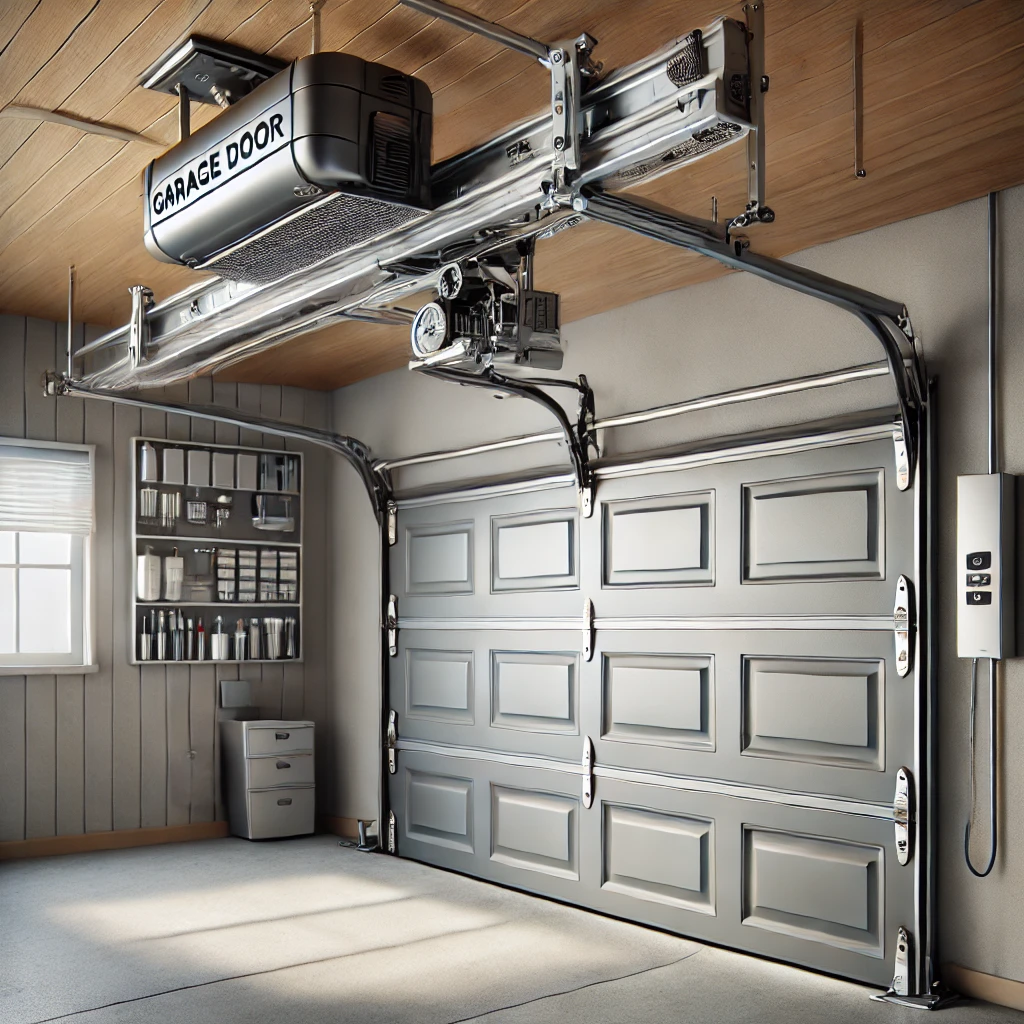
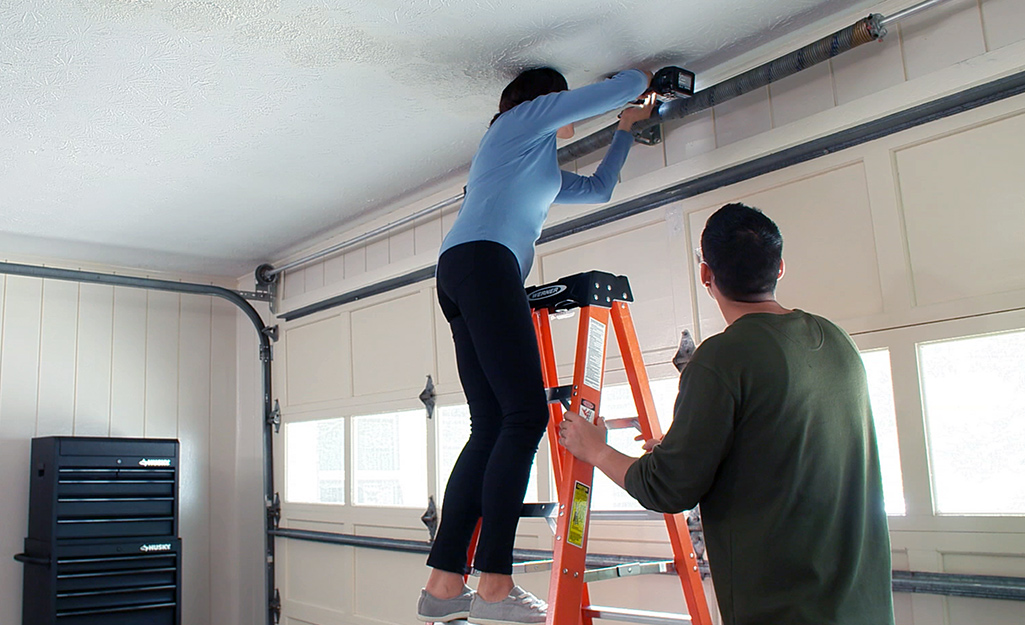
Step 2: Mount the Opener to the Ceiling
With the opener and all components inspected, it’s time to mount the opener to the ceiling. Follow these steps:
- Locate the mounting brackets and hardware included in the kit.
- Using the manufacturer’s instructions and the markings you made earlier, determine the appropriate mounting location for the opener.
- Secure the mounting brackets to the ceiling using the provided hardware and a drill. Ensure that the brackets are level and properly aligned.
- Lift the opener and attach it to the mounting brackets, following the manufacturer’s instructions carefully.
- Double-check that the opener is securely mounted and leveled before proceeding to the next step.
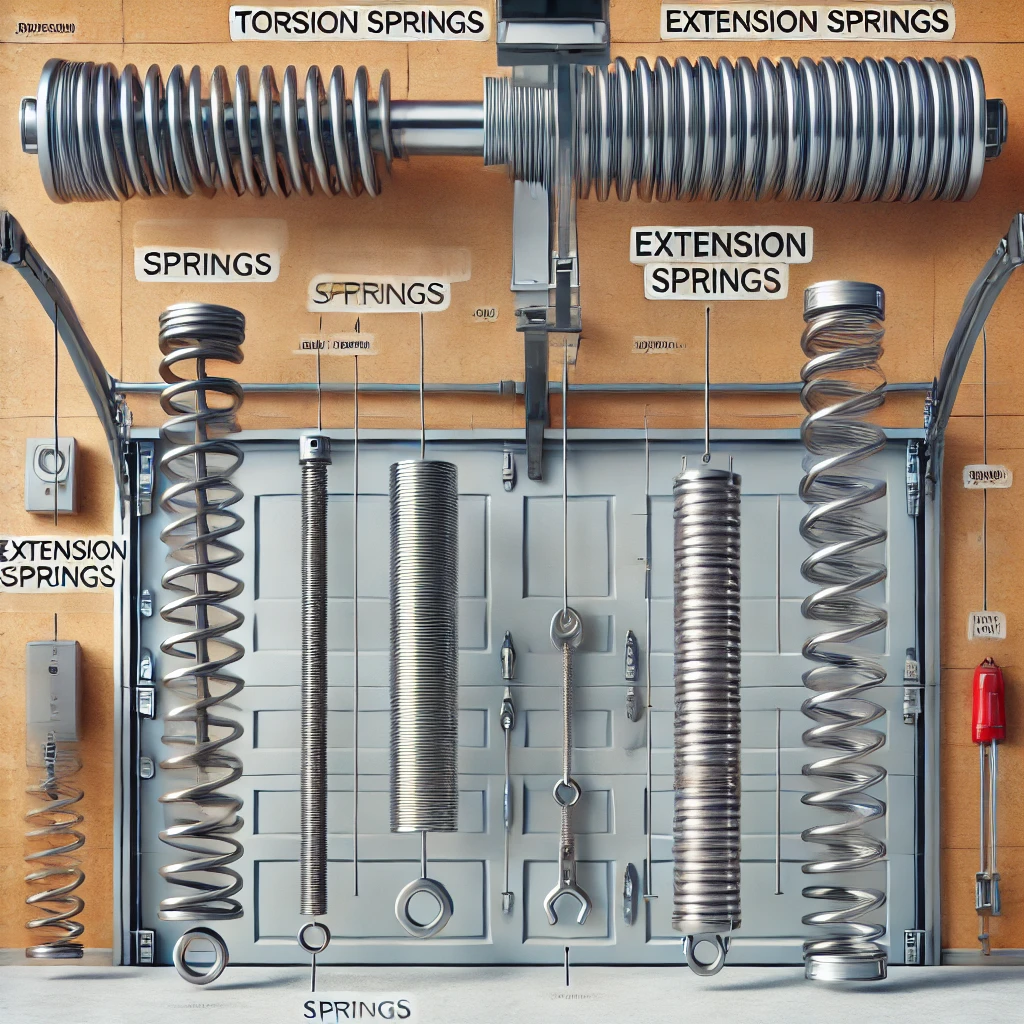
Step 3: Install the Rail and Drive Mechanism
With the opener securely mounted, the next step is to install the rail and drive mechanism. Follow these steps:
- Locate the rail sections and hardware included in the kit.
- Assemble the rail sections according to the manufacturer’s instructions, ensuring they are securely connected.
- Attach the rail to the opener’s motor unit, following the guidelines.
- Extend the rail towards the garage door and secure it to the wall or ceiling using the provided brackets and hardware.
- Install the drive mechanism (chain, belt, or screw) onto the rail, following the manufacturer’s instructions carefully.
- Ensure the drive mechanism is properly aligned and moves smoothly along the rail.
Step 4: Attach the Garage Door to the Opener
With the rail and drive mechanism in place, it’s time to connect your garage door to the opener. Follow these steps:
- Locate the door bracket and hardware included in the kit.
- Attach the door bracket to the center of the garage door, following the manufacturer’s instructions.
- Connect the door bracket to the drive mechanism (chain, belt, or screw) using the provided hardware.
- Adjust the tension and alignment of the drive mechanism to ensure smooth operation.
- Test the connection by manually opening and closing the garage door to ensure proper movement and alignment.
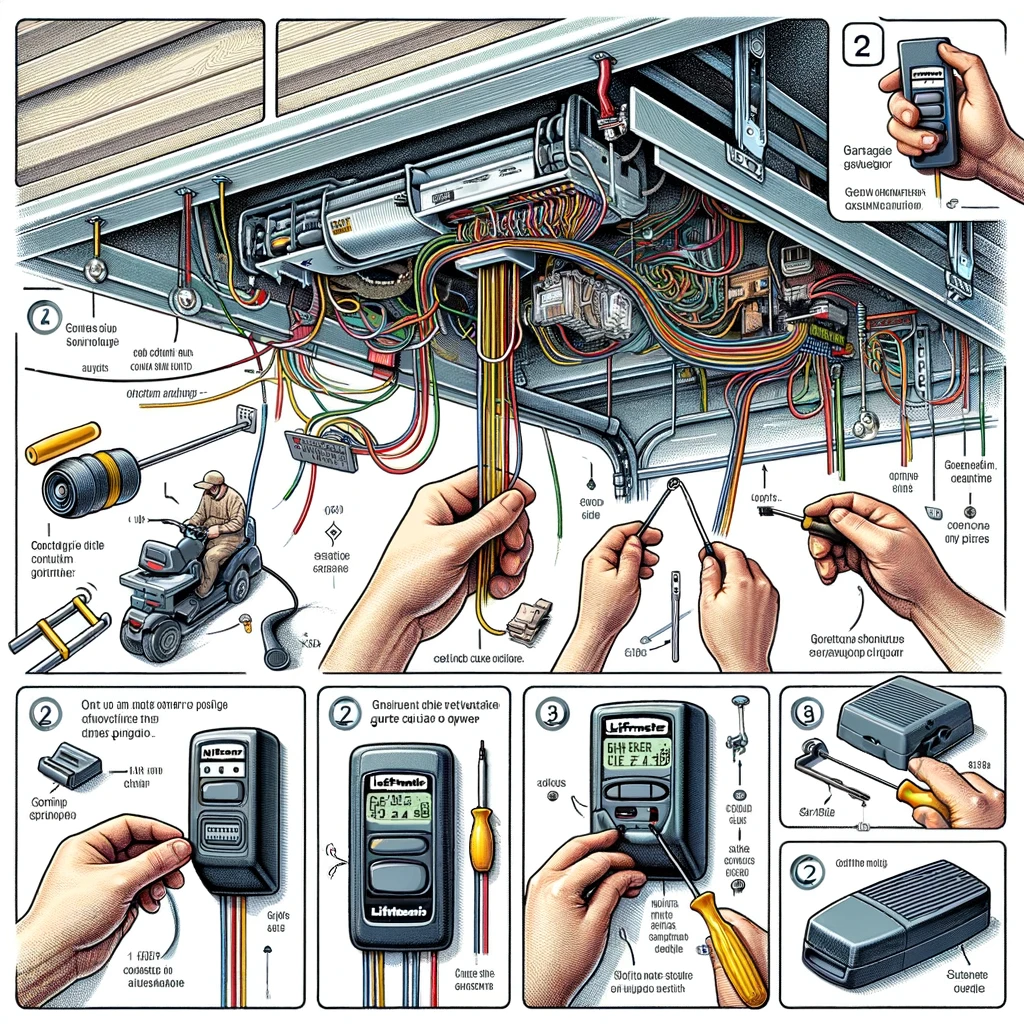
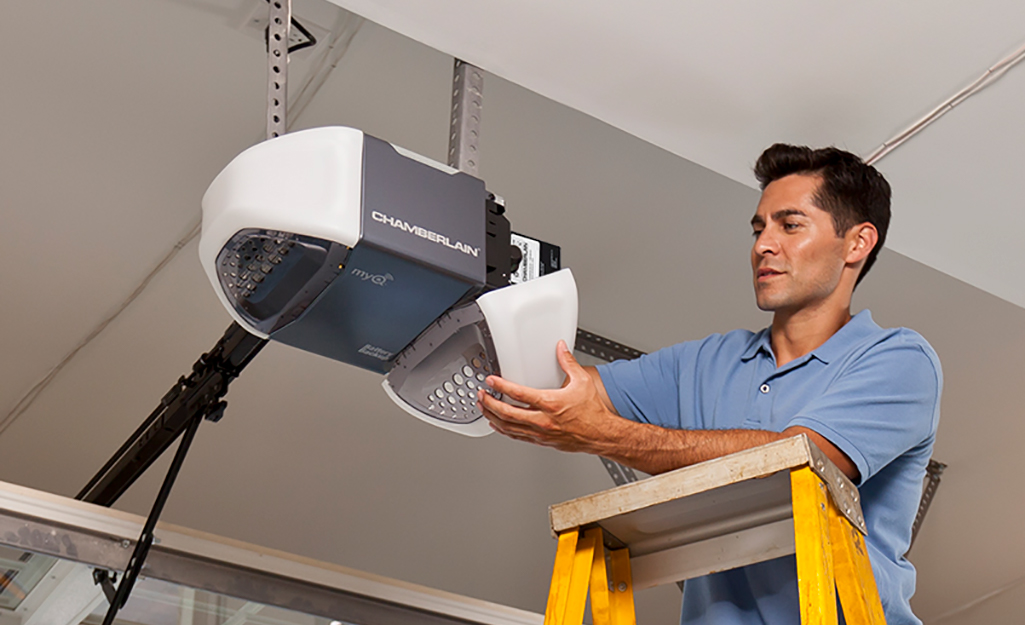
Step 5: Wire and Program the Opener
With the physical installation complete, the next step is to wire and program your garage door opener. Follow these steps:
- Locate the power source and connect the opener according to the manufacturer’s instructions.
- Follow the guidelines to install additional components, such as remote controls, keypads, or smartphone integration systems.
- Program the opener to recognize your remote controls, keypads, or other access devices.
- Set any additional features or preferences, such as automatic closing or lighting options, according to your preferences.
- Test the opener thoroughly by opening and closing the garage door using all available access methods (remote control, keypad, etc.).
Test and Troubleshoot Your Garage Door Opener
After completing the installation, it’s essential to thoroughly test your new garage door opener to ensure proper functionality and identify any potential issues. Follow these steps:
- Open and close the garage door multiple times using all available access methods (remote control, keypad, etc.).
- Check for smooth and quiet operation and proper alignment and tension of the drive mechanism.
- Test any additional features or settings, such as automatic closing or lighting options.
- If you encounter any issues or malfunctions, consult the manufacturer’s troubleshooting guide or seek professional assistance.
Garage Door Opener Maintenance Tips
To ensure your garage door opener continues to function smoothly and efficiently for years to come, follow these maintenance tips:
Regular Inspections
Conduct regular visual inspections of your garage door opener, rail, and drive mechanism to check for any signs of wear, damage, or misalignment. Look for frayed cables, loose bolts, or unusual noises during operation. Identifying these issues early can prevent more significant problems and ensure your garage door operates smoothly and safely.
Lubrication
Lubricate the moving parts of the garage door opener, such as the rail, rollers, hinges, and drive mechanism, according to the manufacturer’s recommendations. Proper lubrication reduces friction, minimizes wear and tear, and helps the door operate quietly. Use a high-quality lubricant specifically designed for new garage doors to ensure optimal performance.
Battery Replacement
If your garage door opener uses a backup battery, replacing it as the manufacturer recommends or when it shows signs of weakness is crucial. A backup battery ensures that your opener will function during power outages, providing you with uninterrupted access to your garage. Check the battery regularly and keep a spare on hand for timely replacements.
Cleaning
Keep the garage door opener and surrounding area clean by removing any debris, dust, or obstructions that may interfere with its operation. Wipe down the opener unit, rails, and sensors with a soft cloth to prevent buildup. Clean sensors are essential for safely operating your garage door, as obstructions can prevent the door from closing properly.
Professional Service
Consider having your garage door opener professionally serviced and inspected annually. A professional technician can thoroughly check all components, identify potential issues, and make necessary adjustments. They can also test the safety features and ensure the opener complies with current safety standards. Regular professional maintenance helps extend the life of your garage door opener and ensures it operates at peak efficiency.
Frequently Asked Questions
How do you program a garage door opener?
Locate the “learn” button on the opener unit to program a garage door opener. Press and release this button, then quickly press the button on the remote you want to program. The opener will acknowledge the signal, and the remote should be programmed.
How to set a garage door remote?
Setting a garage door remote involves syncing it with your opener. Begin by locating the “learn” button on the opener unit. Press and release this button, then press the button on your remote. This action connects the remote to the opener for seamless operation.
How do I connect my garage door opener to my car opener?
Connecting your garage door opener to your car involves programming the opener. Start by finding the “learn” button on the opener unit. Press and release it, then within 30 seconds, press the opener button in your car. The systems will sync, allowing you to open your garage door conveniently from your vehicle.
Can I install a garage door opener myself?
You can install a garage door opener if you have basic mechanical skills and follow the manufacturer’s instructions carefully. Before starting, ensure you have the right tools and understand the installation process.
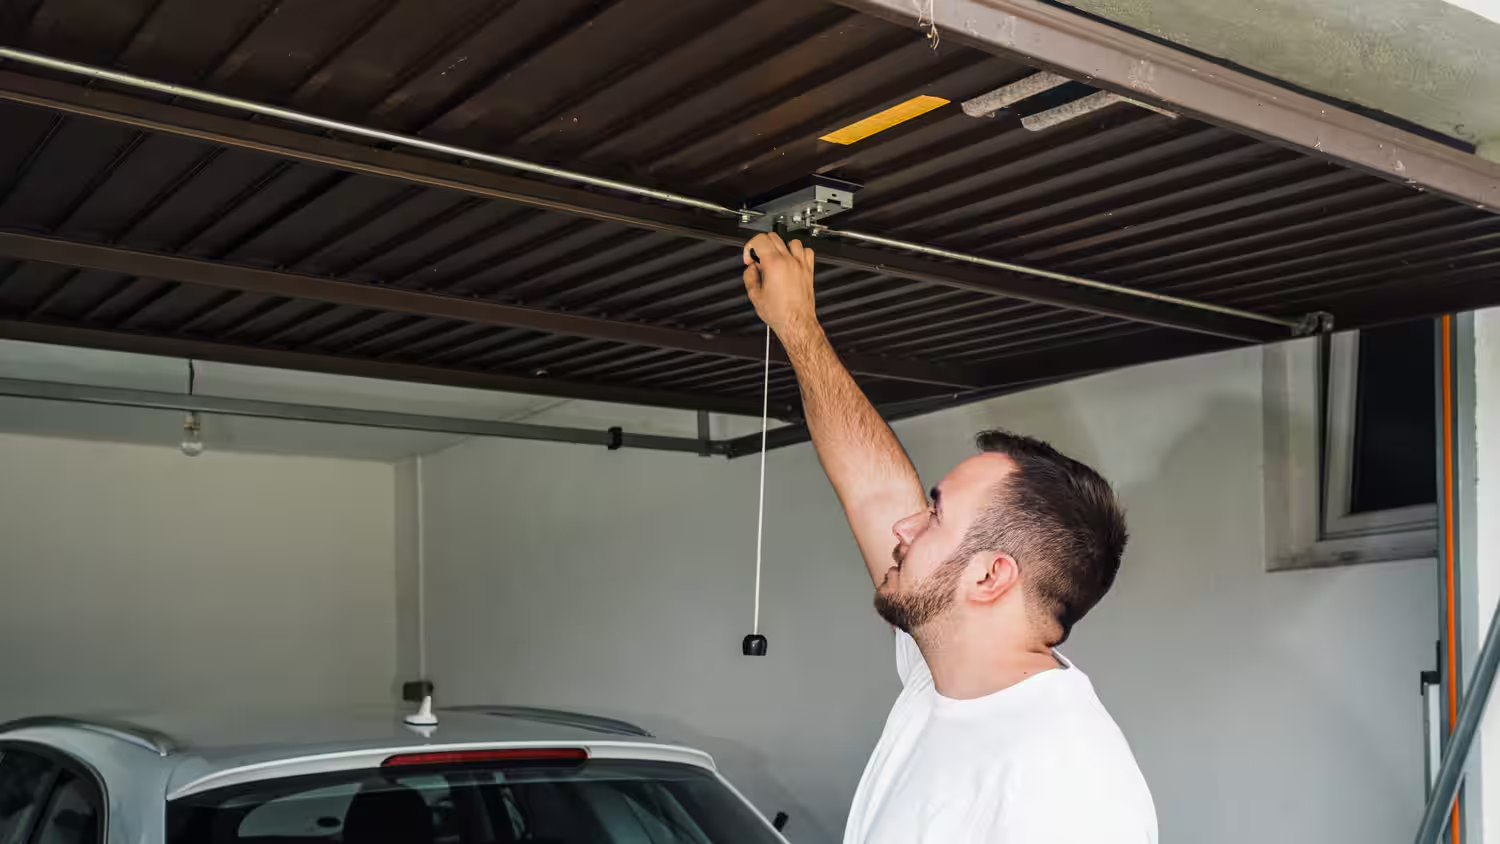
How do I set my garage door opener to manual?
Locate the emergency release cord from the opener track to set your garage door opener to manual mode. Pull this cord down and away from the door to disengage the opener. This allows you to manually open and close the garage door in case of a power outage or malfunction.
Conclusion
At All About Doors, we recognize the pivotal role of a dependable garage door opener in enhancing daily convenience and security. Whether setting up a new opener or upgrading an existing system, our expert garage door contractors are here to provide professional garage door repair services.
Our team ensures your garage door opener installation is seamless and efficient. From selecting the right opener to meticulous assembly and thorough testing, we prioritize your satisfaction and safety. For complex tasks or troubleshooting, our technicians have the expertise to handle wiring intricacies, ensure precise alignment, and swiftly resolve any issues.
With All About Doors, you can rest assured that your garage door opener will operate reliably, enhancing the functionality and security of your home or business. Contact us today to schedule your installation and discover why we are the trusted choice for quality garage door services provided by experienced garage door contractors in your area.
End Note
All About Doors is your go-to garage door contractor in Glen Burnie, MD, and Baltimore County. Our focus on excellence and customer satisfaction sets us apart in the industry.
Explore our Residential Garage Doors to find the perfect fit for your home, and trust our expert team to handle all your Garage Door Repair needs. From routine maintenance to complex repairs, we ensure your garage doors operate seamlessly.
Dive into our Gallery to see our quality work and get inspired for your next project. Our blog offers the latest tips and industry insights, sharing valuable information to help you keep your garage doors in top condition.
Learn more about our story and dedication to exceptional service on our About Us page. If you have any questions or need to schedule a service, visit our Contact Us page for easy access to our team.
Join our vibrant community on Facebook to stay informed about our latest projects and promotions. Trust All About Doors to be your reliable garage door contractor, delivering the best garage door repair and services. For more details and to book your service, visit our Website. Experience the difference with All About Doors today!